ReelUp tracking pixel Read the Privacy Policy

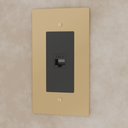
Ethernet Socket (RJ45) (Custom Module)

Event Price: $12
Regular Price: $15
Memorial Day Sale
Regular price

Members save an extra 10% off — Join Now

MEMO26
Tags: addb2b not on discount tag_module_item
All Bestseller
18
All Non Discounted Products
15
Best Selling Products
Electrical Modules and Parts
Newest Products
Parts and Modules
Products
15
Free shipping — Arrives:  · 30-day returns · 1-year warranty

The estimated shipping time is a suggestion based on current material availability. Customized orders may take up to 15 additional days for custom fabrication and material sourcing.

Ethernet Socket (RJ45) (Custom Module)

Ethernet Socket (RJ45) (Custom Module)

$15.00

Product Details

Everything you need to know
Why you'll love it
  1. Timeless design complements any decor
  2. Smooth, quiet operation enhances user experience
  3. Resistant to wear for lasting elegance
Installation Guide

Product Includes

Brass plate, your selected outlet type (Standard, USB-C, or GFCI), and mounting accessories.

Installation Steps

Step 1: Turn Off the Power
Before starting, make sure to turn off the power to the outlet at your home’s circuit breaker or fuse box to ensure your safety.

Step 2: Remove the Old Cover Plate
Use your screwdriver to remove the screws holding the old cover plate in place. Gently take off the cover plate and set it aside.

Step 3: Take Out the Old Outlet
Unscrew the screws securing the old outlet to the electrical box and gently pull out the outlet.

Step 4: Disconnect the Wires
Carefully disconnect the wires from the old outlet.

  • If the wires are wrapped around the screws, loosen the screws to free the wires.
  • If inserted into holes on the back of the outlet, use a wire stripper to cut and strip the wires as needed.

Step 5: Connect the Wires to the New Outlet
Attach the wires to the new brass outlet.

  • If there are screws, wrap the wires around them and tighten.
  • If there are holes, insert the stripped wire ends into the terminals.
  • Follow the markings for Line, Neutral, and Ground, especially for GFCI and USB-C outlets.

Step 6: Secure the New Outlet
Carefully tuck the wires back into the electrical box and secure the new outlet to the box with the provided screws.

Step 7: Attach the New Cover Plate
Place the new brass cover plate over the outlet and secure it with the screws.

Step 8: Turn the Power Back On
Once everything is securely in place, turn the power back on at the circuit breaker or fuse box.

Step 9: Test Your New Outlet
Plug in a device to ensure the outlet is supplying power.

  • For USB-C models, test with a compatible charger.
  • For GFCI outlets, press the “Test” and “Reset” buttons to confirm proper functionality.
  • If anything seems off or you're unsure, reach out to a certified electrician. Safety comes first!

Request call back

Our design concierge will call you within 2 minutes.

    Thank you! We've received your request.
    Design Consultation

    Need help planning your project? Book a complimentary 15-minute consultation with our design team for layout guidance and expert advice.
    Book now